 2M+ orders fulfilled
 The Do's and Don’ts of Embroidery Design: How to Get It Right Every Time

Embroidery is seriously taking off in the fashion world! And it's no surprise - embroidery is unique, durable, and can be applied to just about any garment or accessory. In this blog, we're going to show you how to get the most out of your embroidery design, and you'll soon be on your way to creating beautiful designs that stand out on any product.
Understanding Embroidery Sizes and Threads
When designing for embroidery, there are two main things to keep in mind: the number of colours, and the level of detail in your design.
Check out these examples which are both bold designs with six colours, providing a premium embroidery result:
Number of Colours
Do use 6 or fewer colours.
Don't include gradients.
Due to the small size of embroidery, we can't fit an unlimited number of colour changes and your design must be kept to a maximum of six colours (or two colours for 3D foam).
If you're making a design from scratch, why not pre-select the colours before creating your design. We have over 32 embroidery thread colours to choose from, pick your favourite palette and away you go!

Pro Tip: Use the hex codes from our embroidery design guidelines to create your design with the correct colours.
Use Solid Colours, Not Gradients
Your embroidery design will be stitched together using individual colours, and gradients aren't suitable for embroidery because two different colours of embroidery thread won't blend together. Keep your colours solid and separate for the best result!
Level of Detail and Line Widths
Do use bold lines and clean shapes.
Don't use skinny lines or textured shapes.
One of the most important things to consider when you're designing for embroidery is the quality and the weight of the lines that you use. This determines how neatly your design will be digitised, and plays a huge part in the final outcome.
If your lines are too thin, they'll be embroidered as a simple run stitch, which can cause your design to look messy if it's unintended.
Using thicker lines and bolder shapes guarantees that your design will be embroidered with nice, full satin stitches. We recommend a minimum line width of 0.125cm, which equates to 15pt in a 10x10cm artboard at 300ppi.
Pro Tip: Imagine drawing your design with a marker pen instead of a biro. That's the look you need to go for with embroidery!
Make sure your outlines are thick too! If they're too thin, the outline might not fully cover the edge of the shape that it is lining.
Don't Include Tiny Details
When you make a design for embroidery, make sure that it is bold and doesn't have too many small details. If the design has too many tiny details, they might not show up well when it is embroidered.
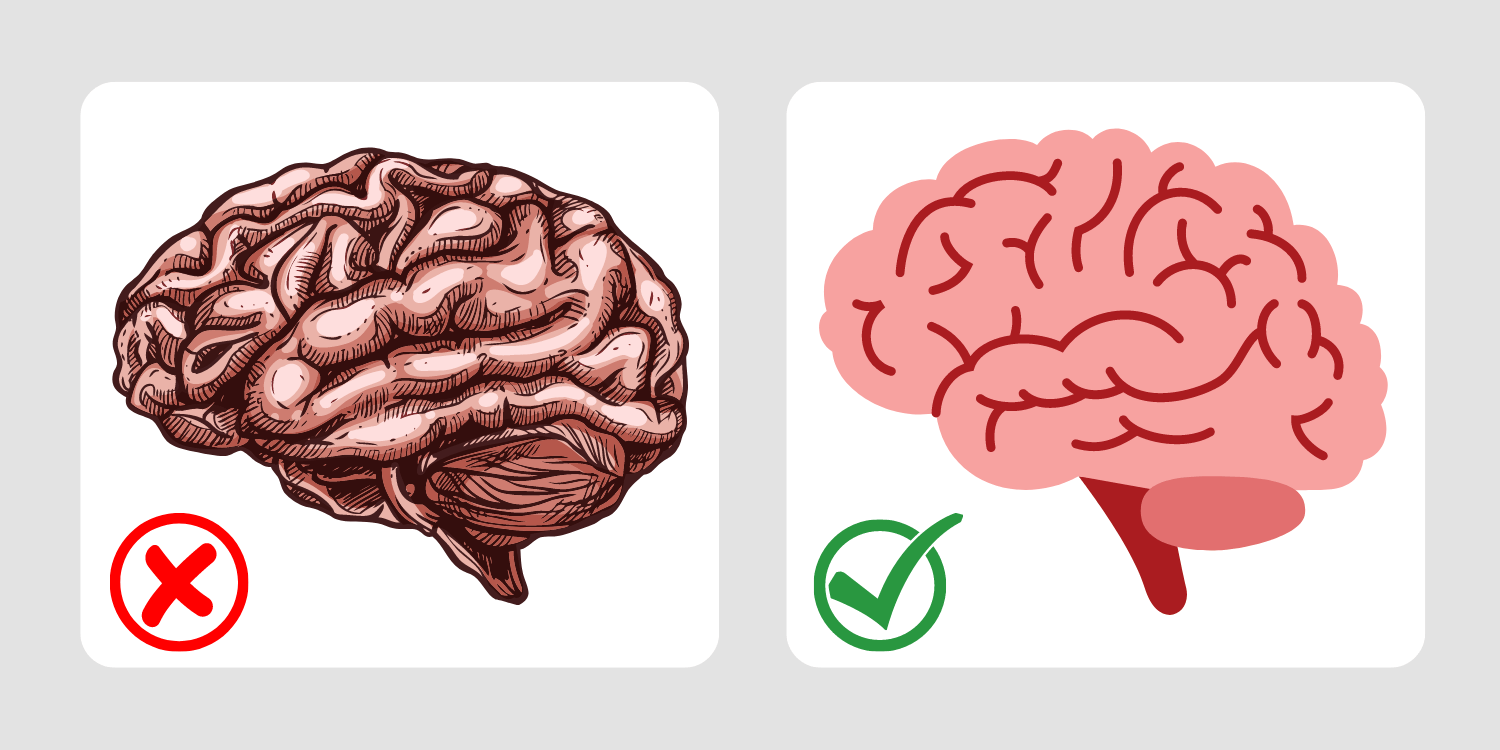
To get an idea of how much detail is too much, upload your design to an embroidered product mockup on our site. If you can't see the details in the embroidery on the mockup, it's probably not going to show up well when it's embroidered.
The level of detail you can use will also depend on the overall size of the embroidery. A design that's being embroidered on a t-shirt at 10x10cm can be more detailed than a beanie at a maximum height of 5.5cm.
Pro Tip: Measure your line widths in Photoshop by scaling your design to the template size (i.e. 10x10cm) and using the marquee tool to select the line. You're looking for a minimum size of W: 0.13cm.
If you've got a detailed design you love but it's just not right for embroidery - why not print it instead!
Including Text in Your Design
Do use sans-serif fonts and bold text with a minimum size of 10pt.
Don't use serif fonts with extending features.
If your design includes text, you'll need to be extra careful to make sure it's legible when embroidered.
When submitting a company logo for embroidery, we always recommend submitting your logo design as a standalone design without any text, and if you need your company name embroidering this should be a separate design.
When using text in your design, follow this simple rule: If you can't read it on the mockup, it's too small.
How to Add Borders
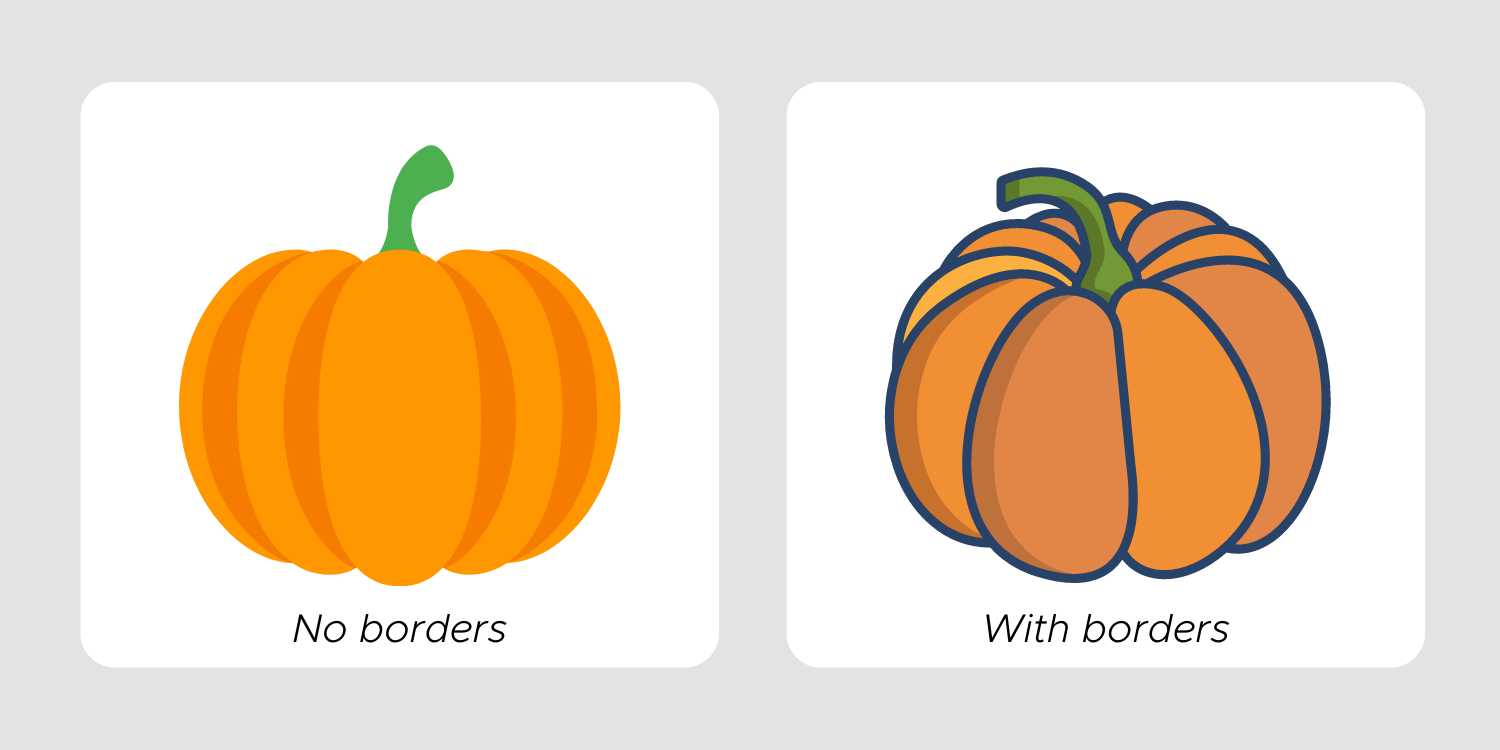
We often get asked how you can add an embroidered border to your design, and it's really as simple as having a border in your design file.
Take this design below for example. When the left design is digitised, we would not add a border because it's not present in the design.
However if you uploaded the design on the right-hand side, we would embroider this with a border because it's included in the design. The border can be embroidered with any colour that you choose, and doesn't have to mimic the colour in the original design file.
It's now time to put what you've learned into action!
We hope you've found this post helpful, and that it's given you a better understanding of the do's and don'ts of designing for embroidery.
Feel free to submit your original embroidery designs to our support team, and we'll be happy to give you our feedback before you place an order.
We can't wait to see what you come up with!
Sign up today for a 50% discount on your first sample order up to £50.
Already using us? Take 10% off your sample order with code DEC10 until 31st December 2022.

Caroline Clarke | Head of Customer Experience