 2M+ orders fulfilled
 How To Remove A White Background In PhotoPea
Watch the video, or scroll down for the step-by-step guide.
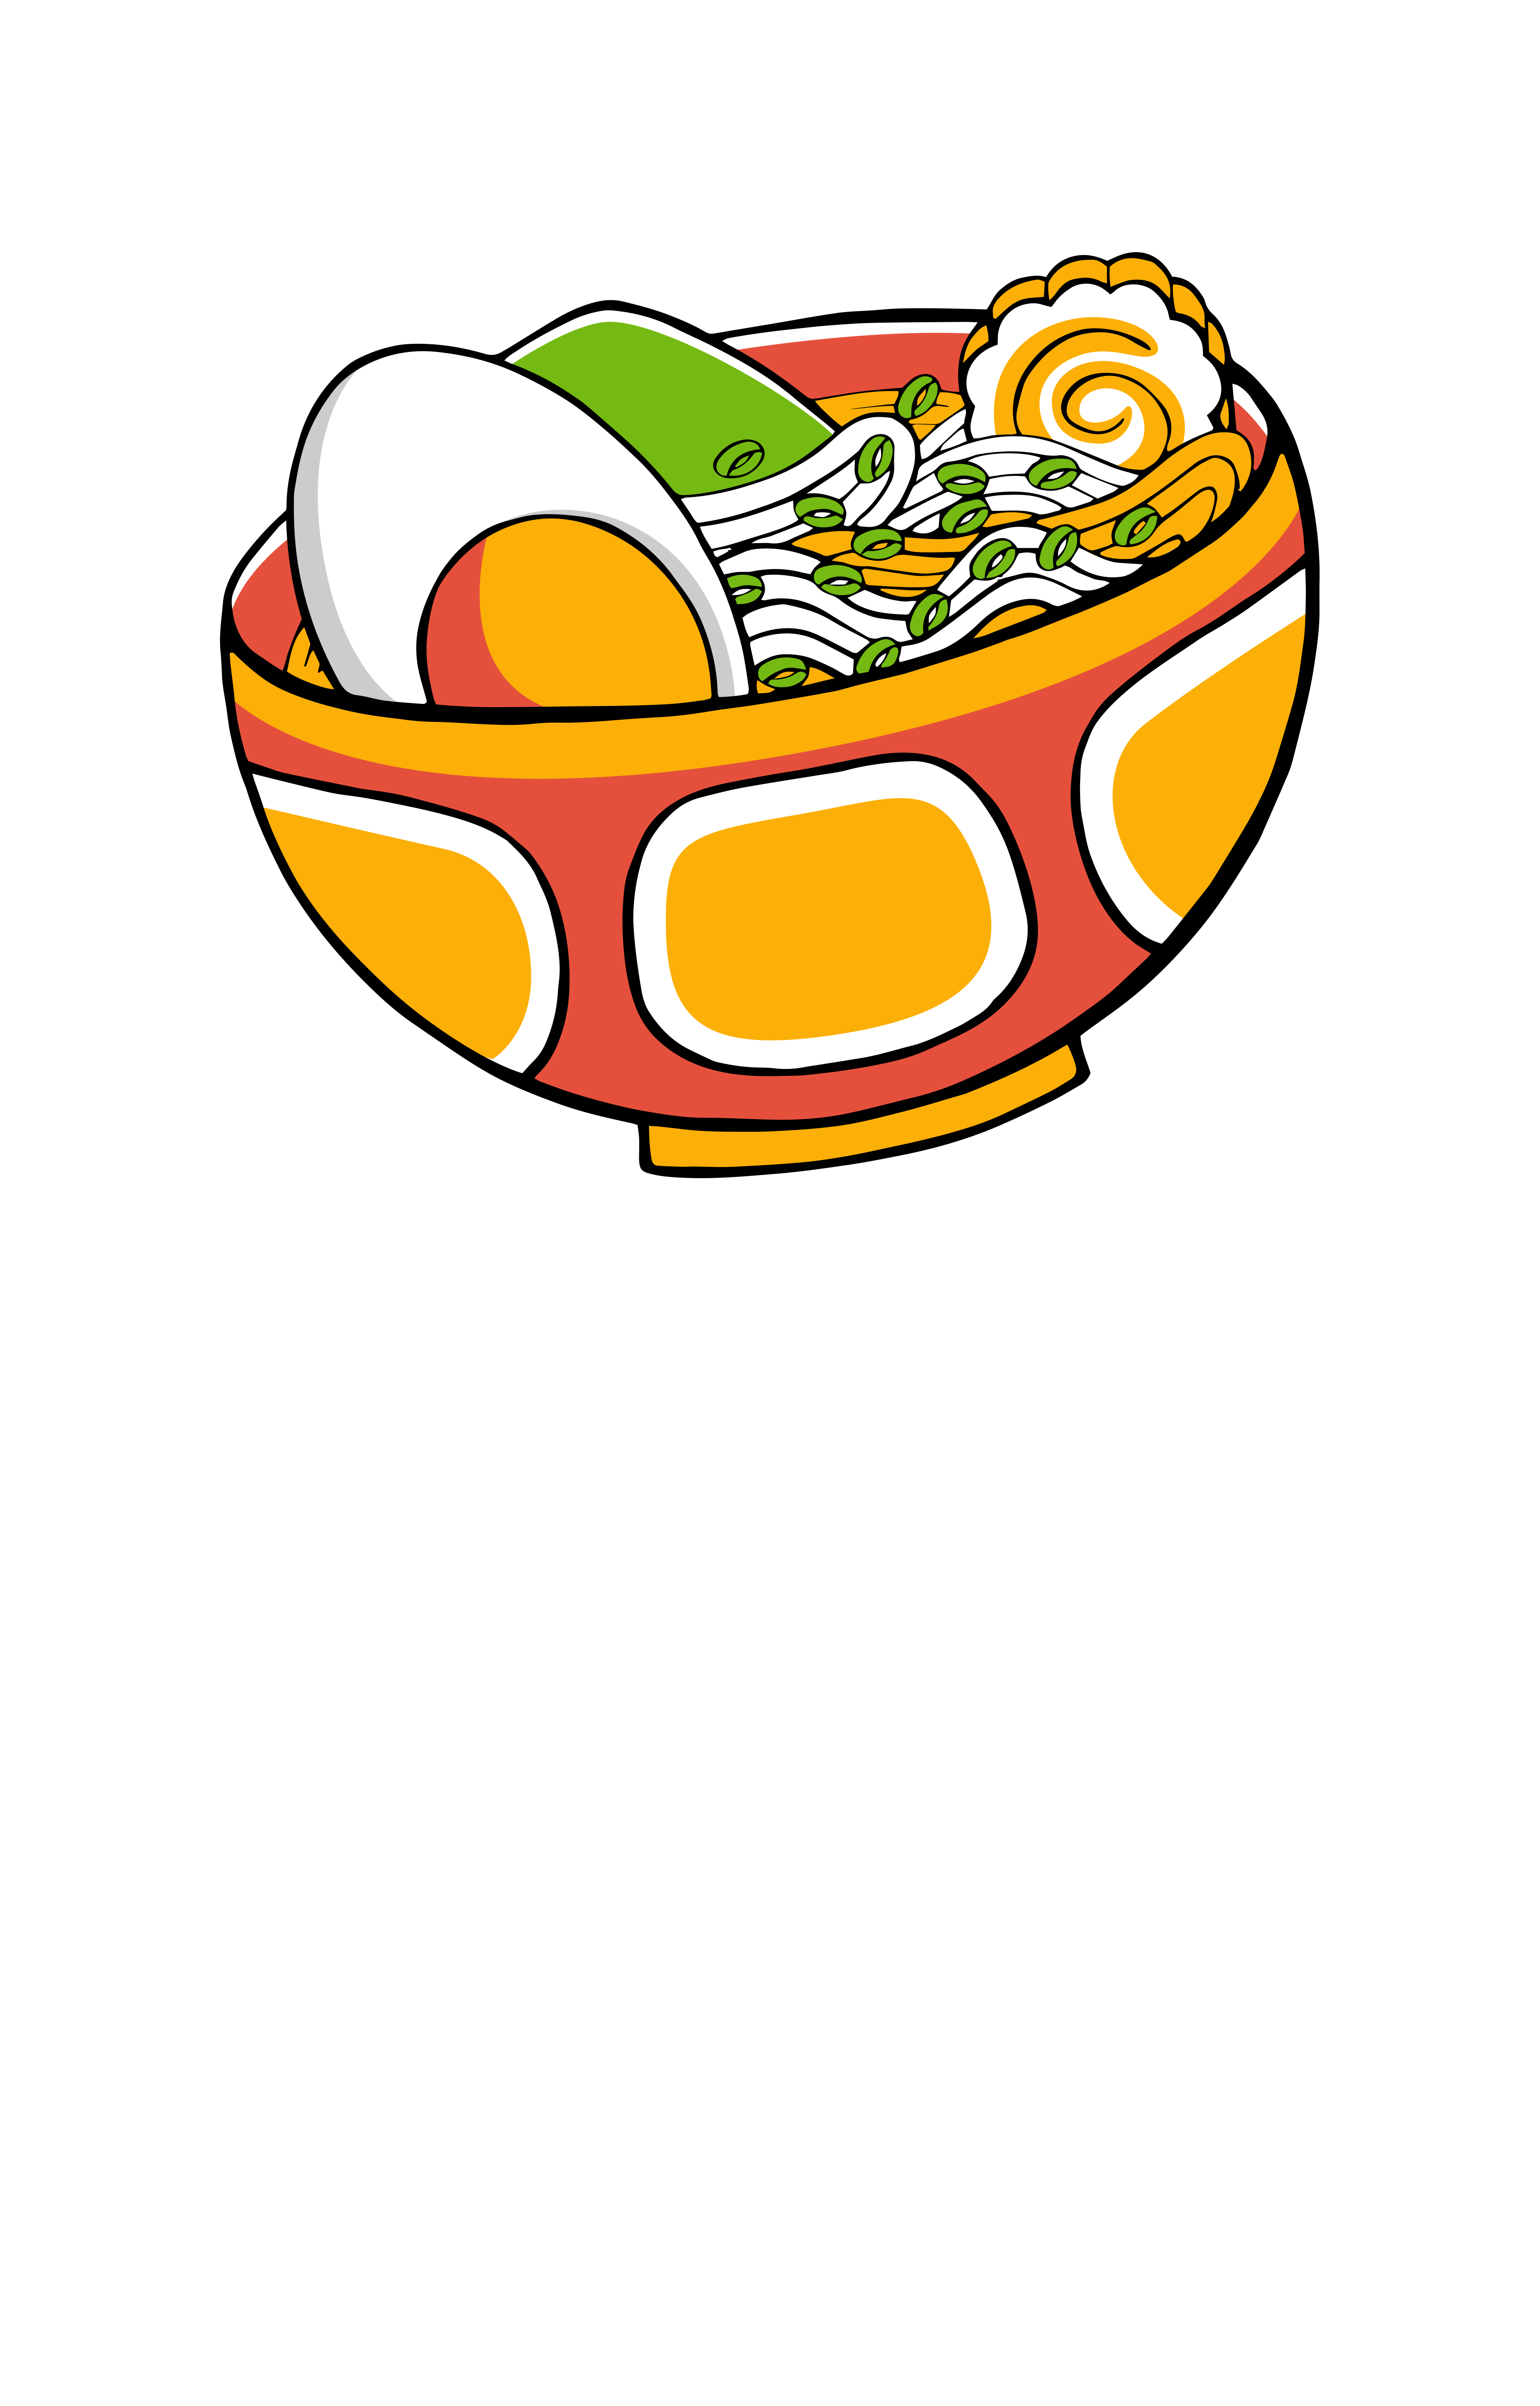
If you'd like to download the sample file to follow along, click here.
Do you have a design with a white background that needs to be printed? Taking out the white backdrop from an image may appear difficult, but it's actually quite simple! With the right tools and techniques, anyone can quickly remove a white background.
Ready to print your designs without a white background? This guide will show you an easy-to-use, free online design software that'll do the job - PhotoPea - and also give tips on colour selection and other things to consider when eliminating backgrounds. Let's begin!
Ready to print your designs without a white background?
Sign up for Inkthreadable today and get started! With our speedy print-on-demand service, you'll get access to top-quality printing options and can choose from over 250+ products to print. From custom t-shirts, mugs, and hoodies to e-commerce automation, Inkthreadable has you covered.
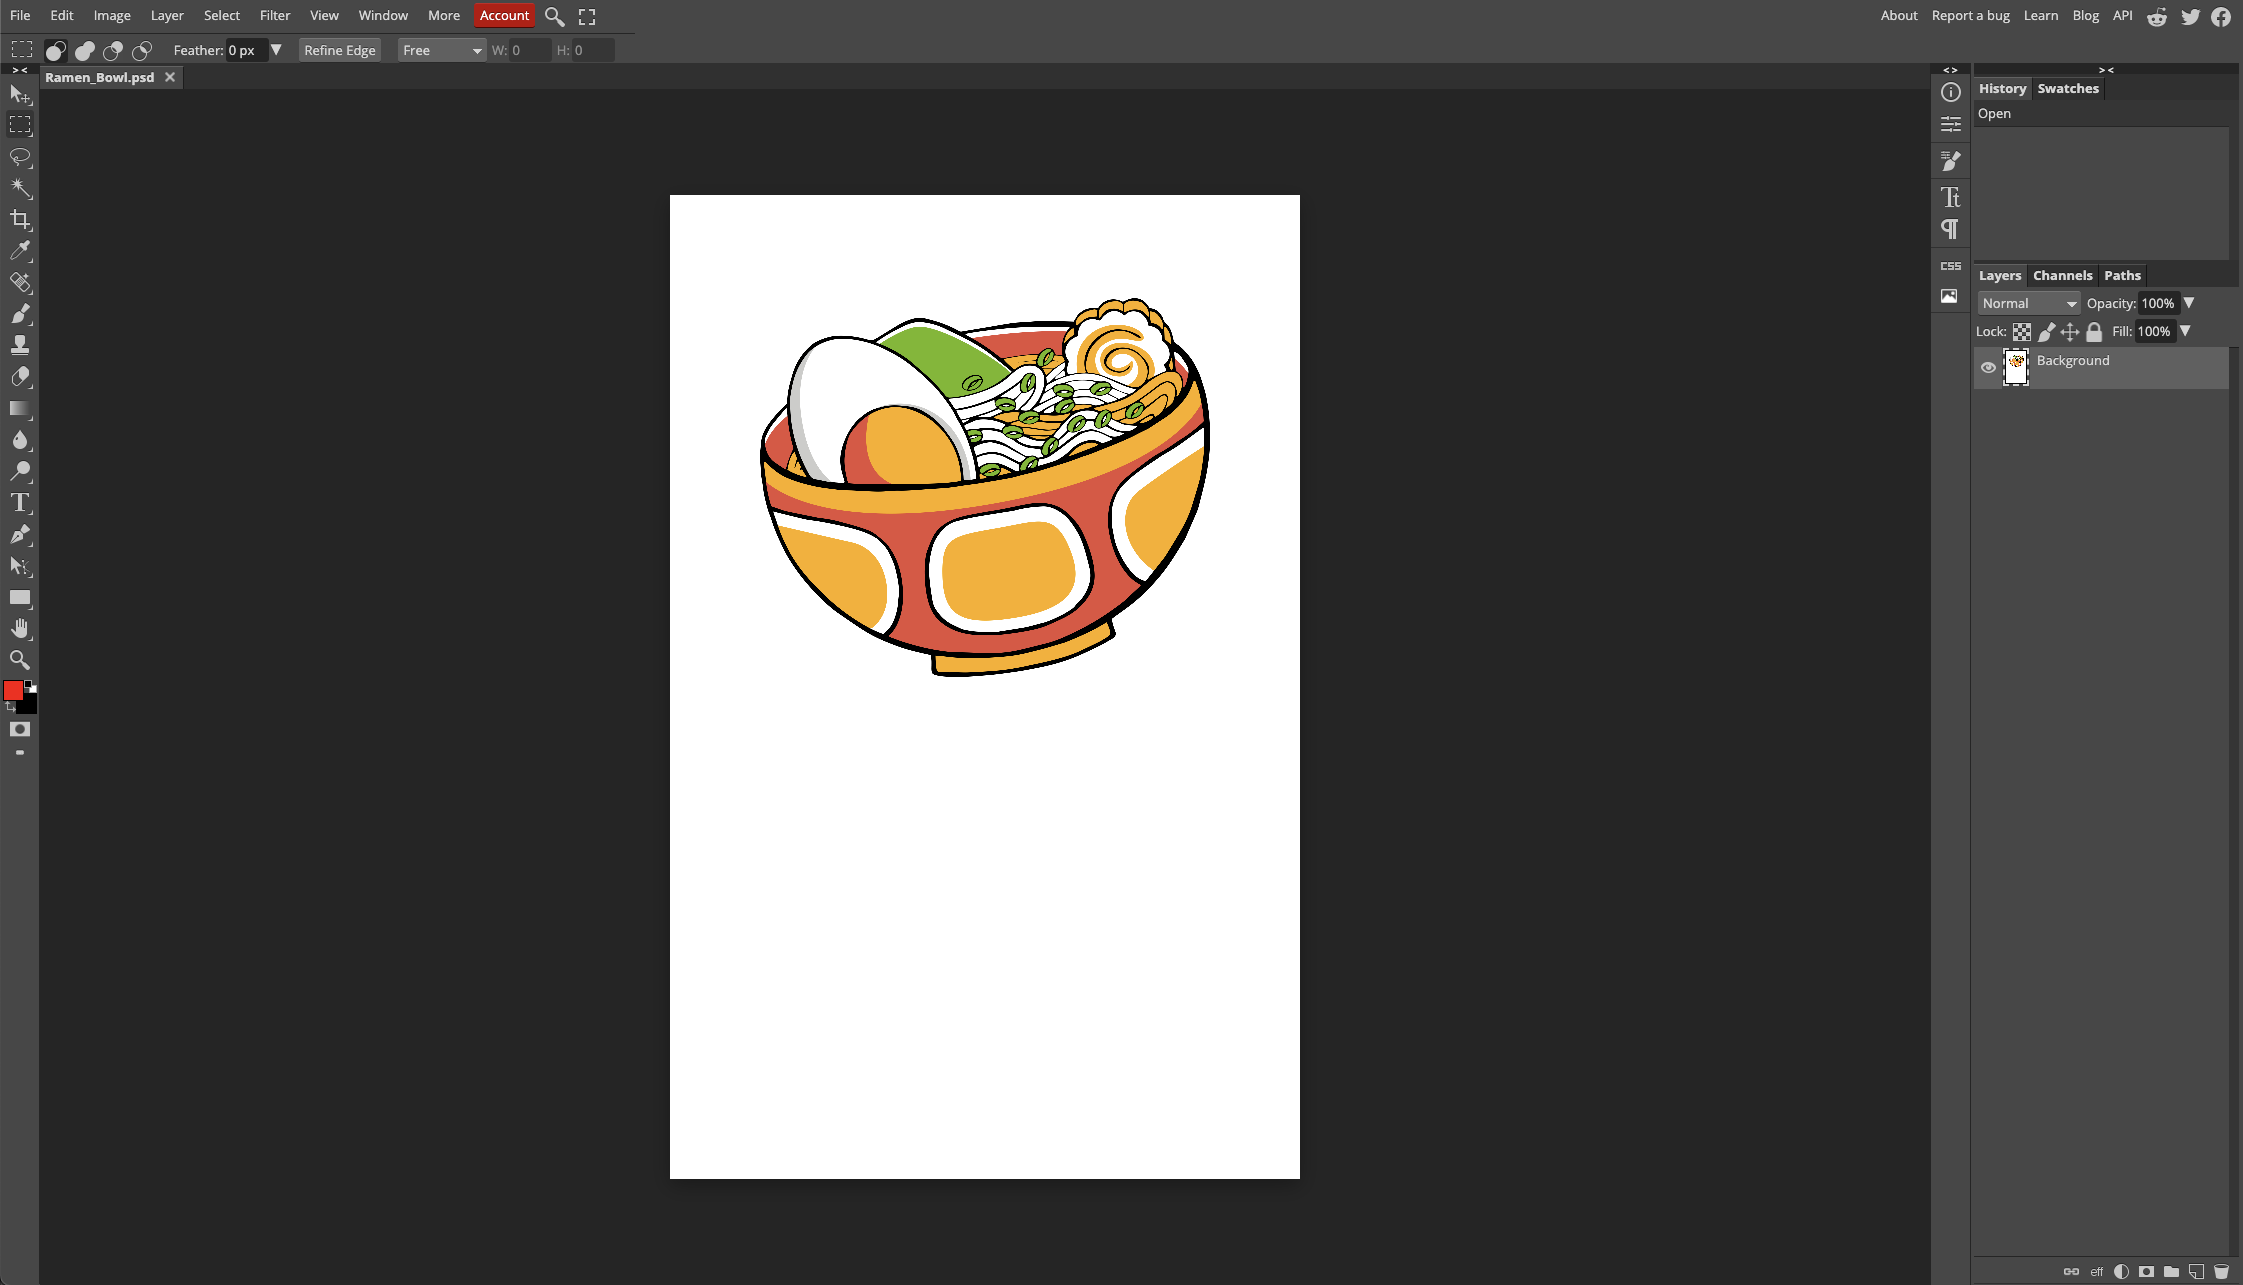
Step 1:
Open your image in Photopea, either by dragging and dropping your file or by clicking "File" - "Open" and selecting the file from your PC.
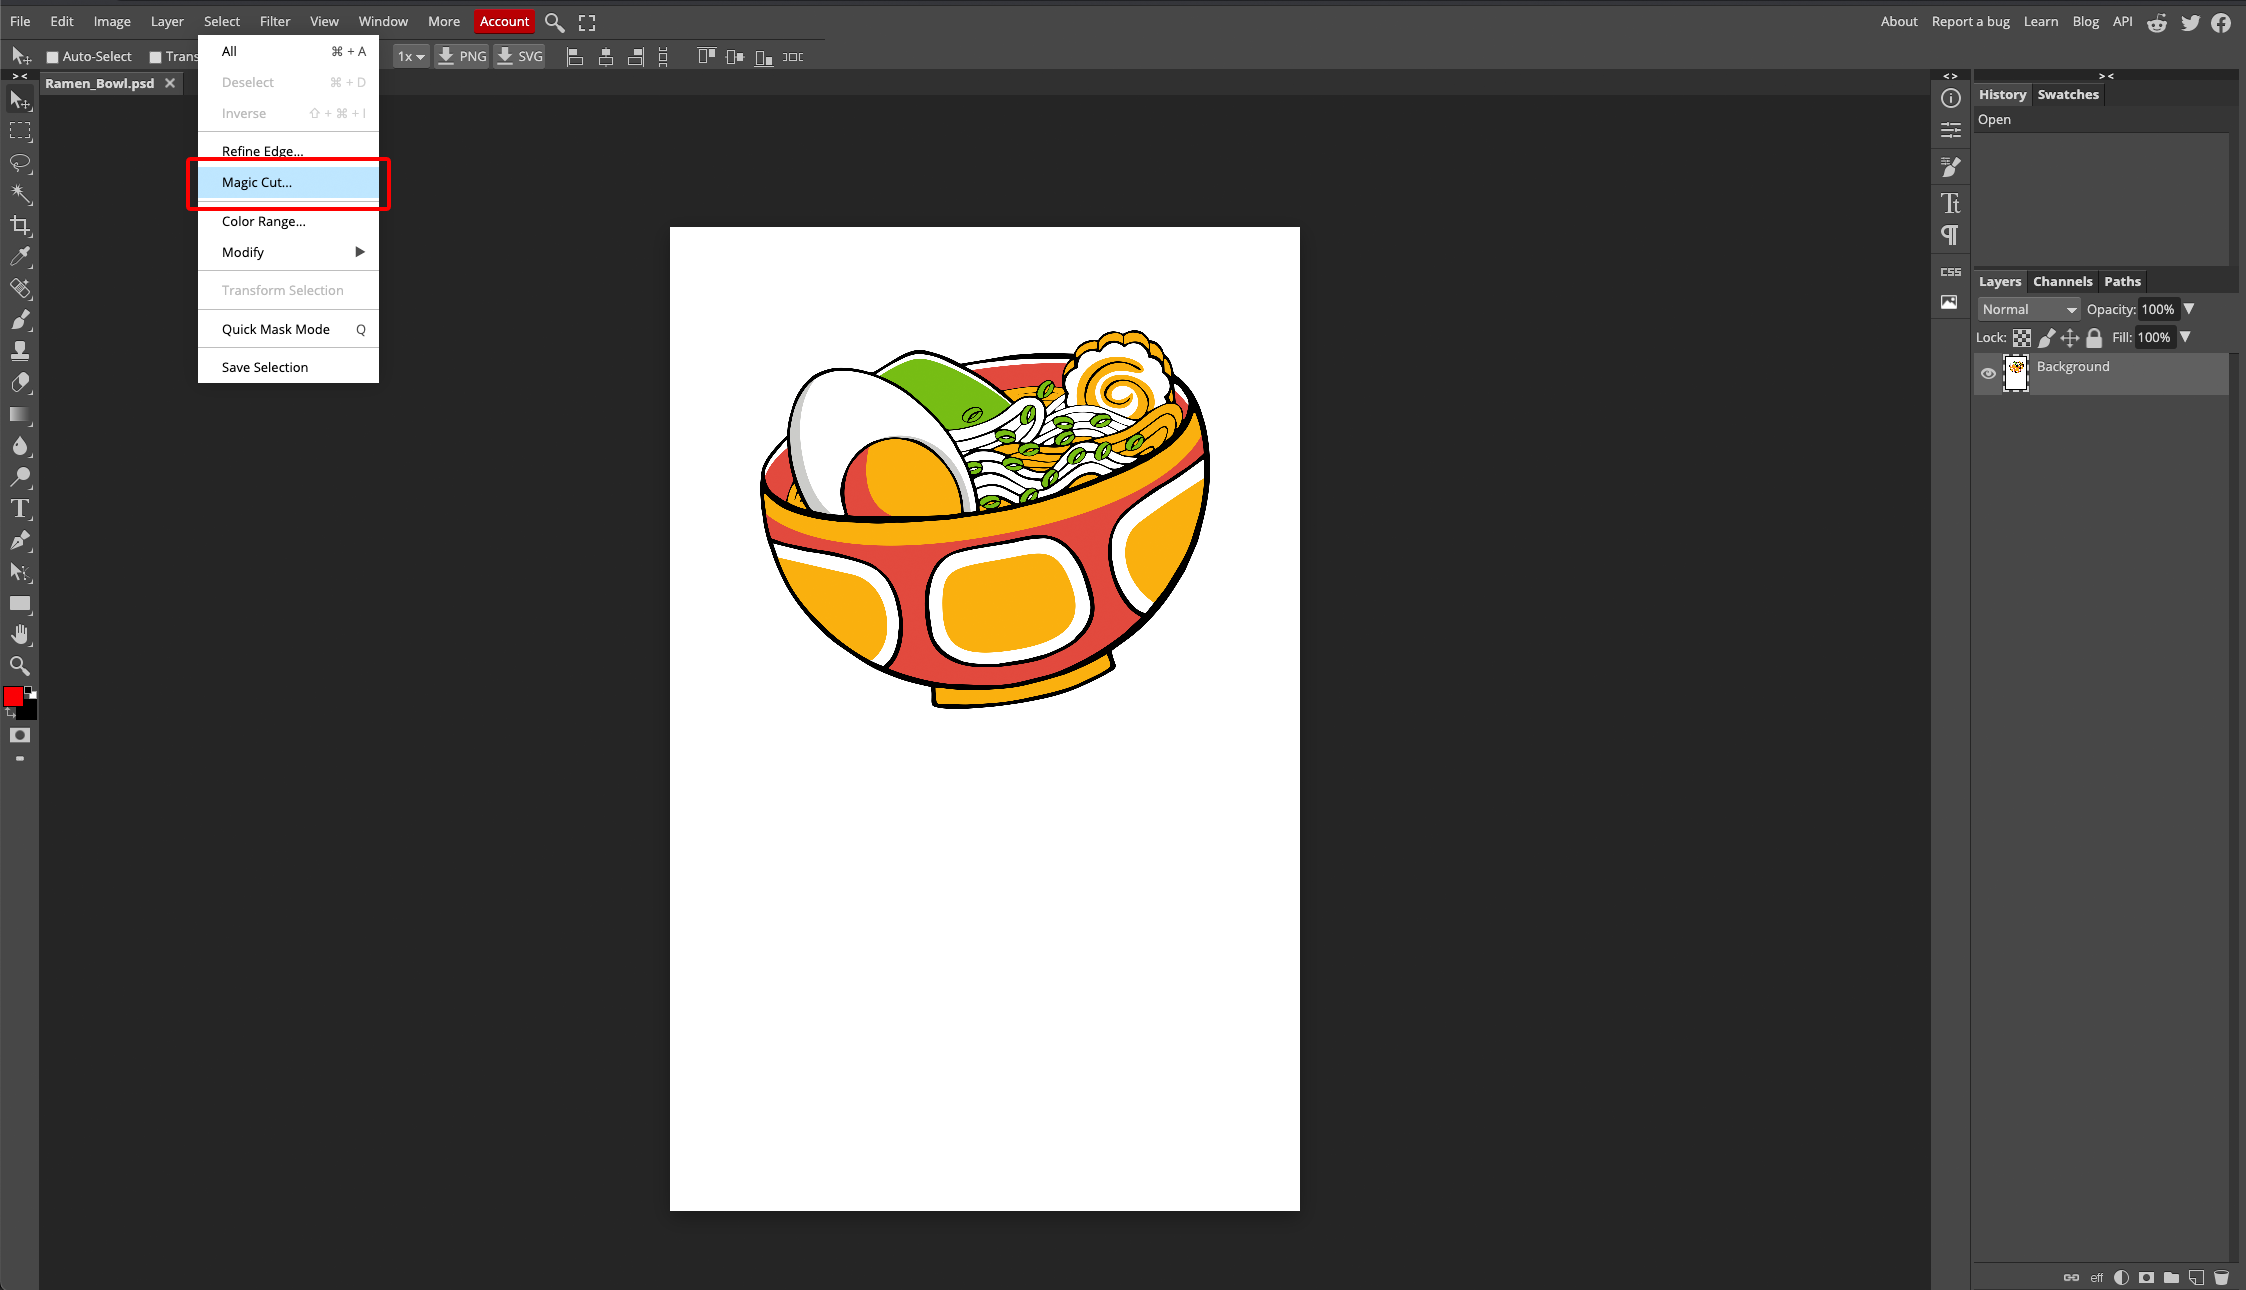
Step 2:
In the navigation Bar, choose "Select" followed by "Magic Cut...".
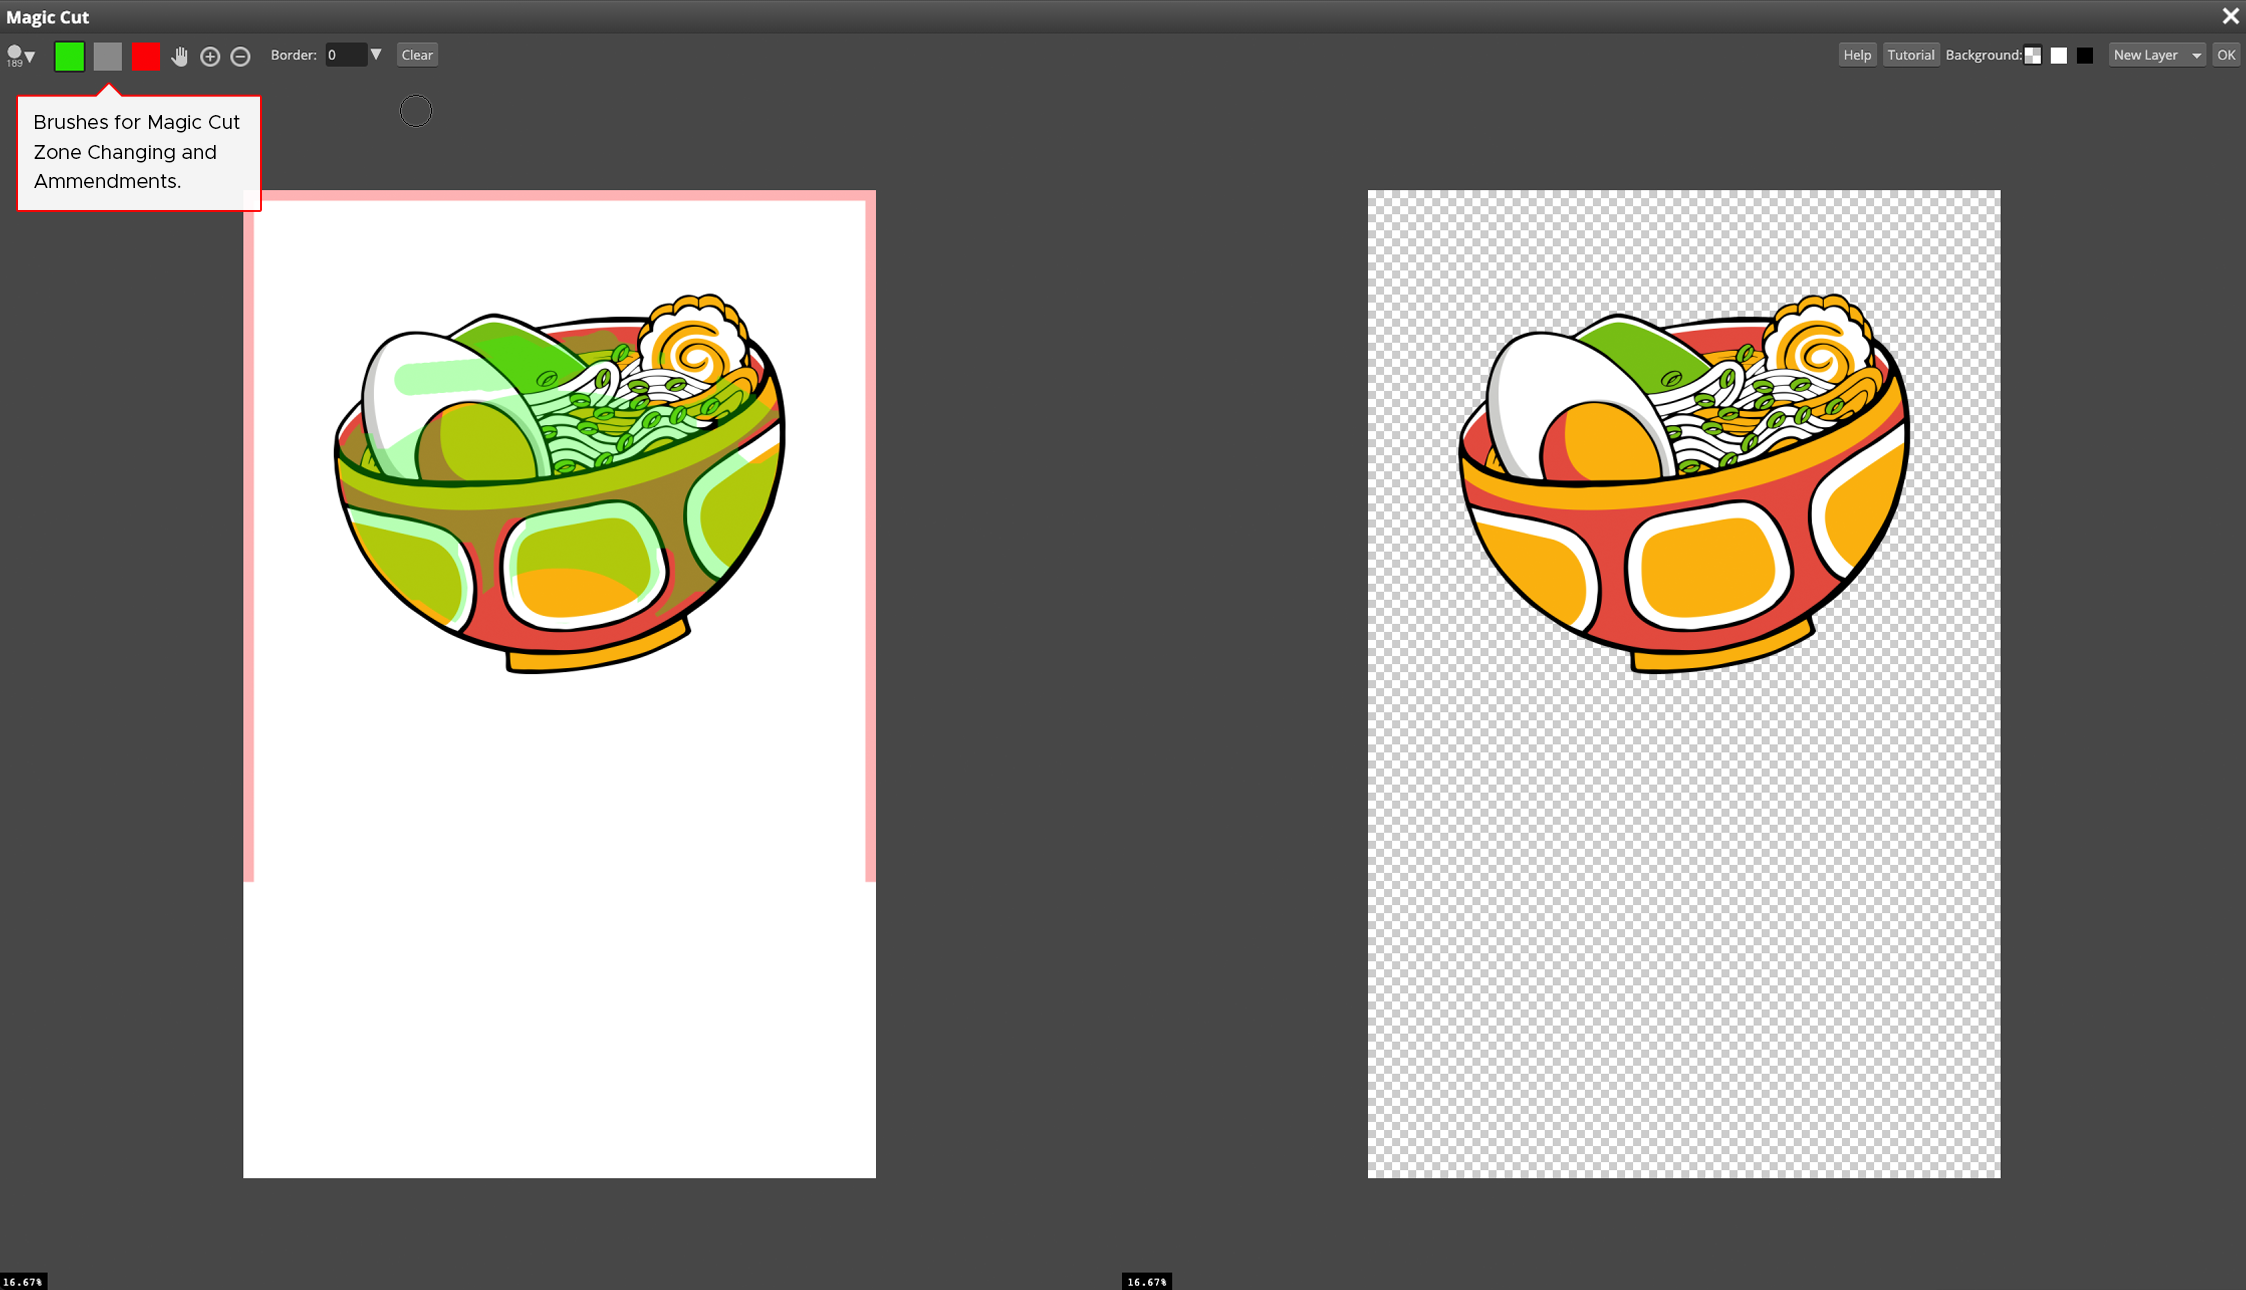
Step 3:
A new window will appear, showing you the original file on the left and the preview on the right. Photopea's Magic Cut tool is very powerful and should select your white background automatically, but if there are any areas the tool hasn't worked correctly, you can use the green or red brushes on the left image to select further areas to add/remove.
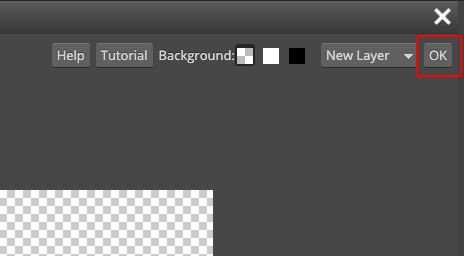
Step Four:
Once you're happy with the preview, click the 'OK' button in the top right corner.
Step Five:
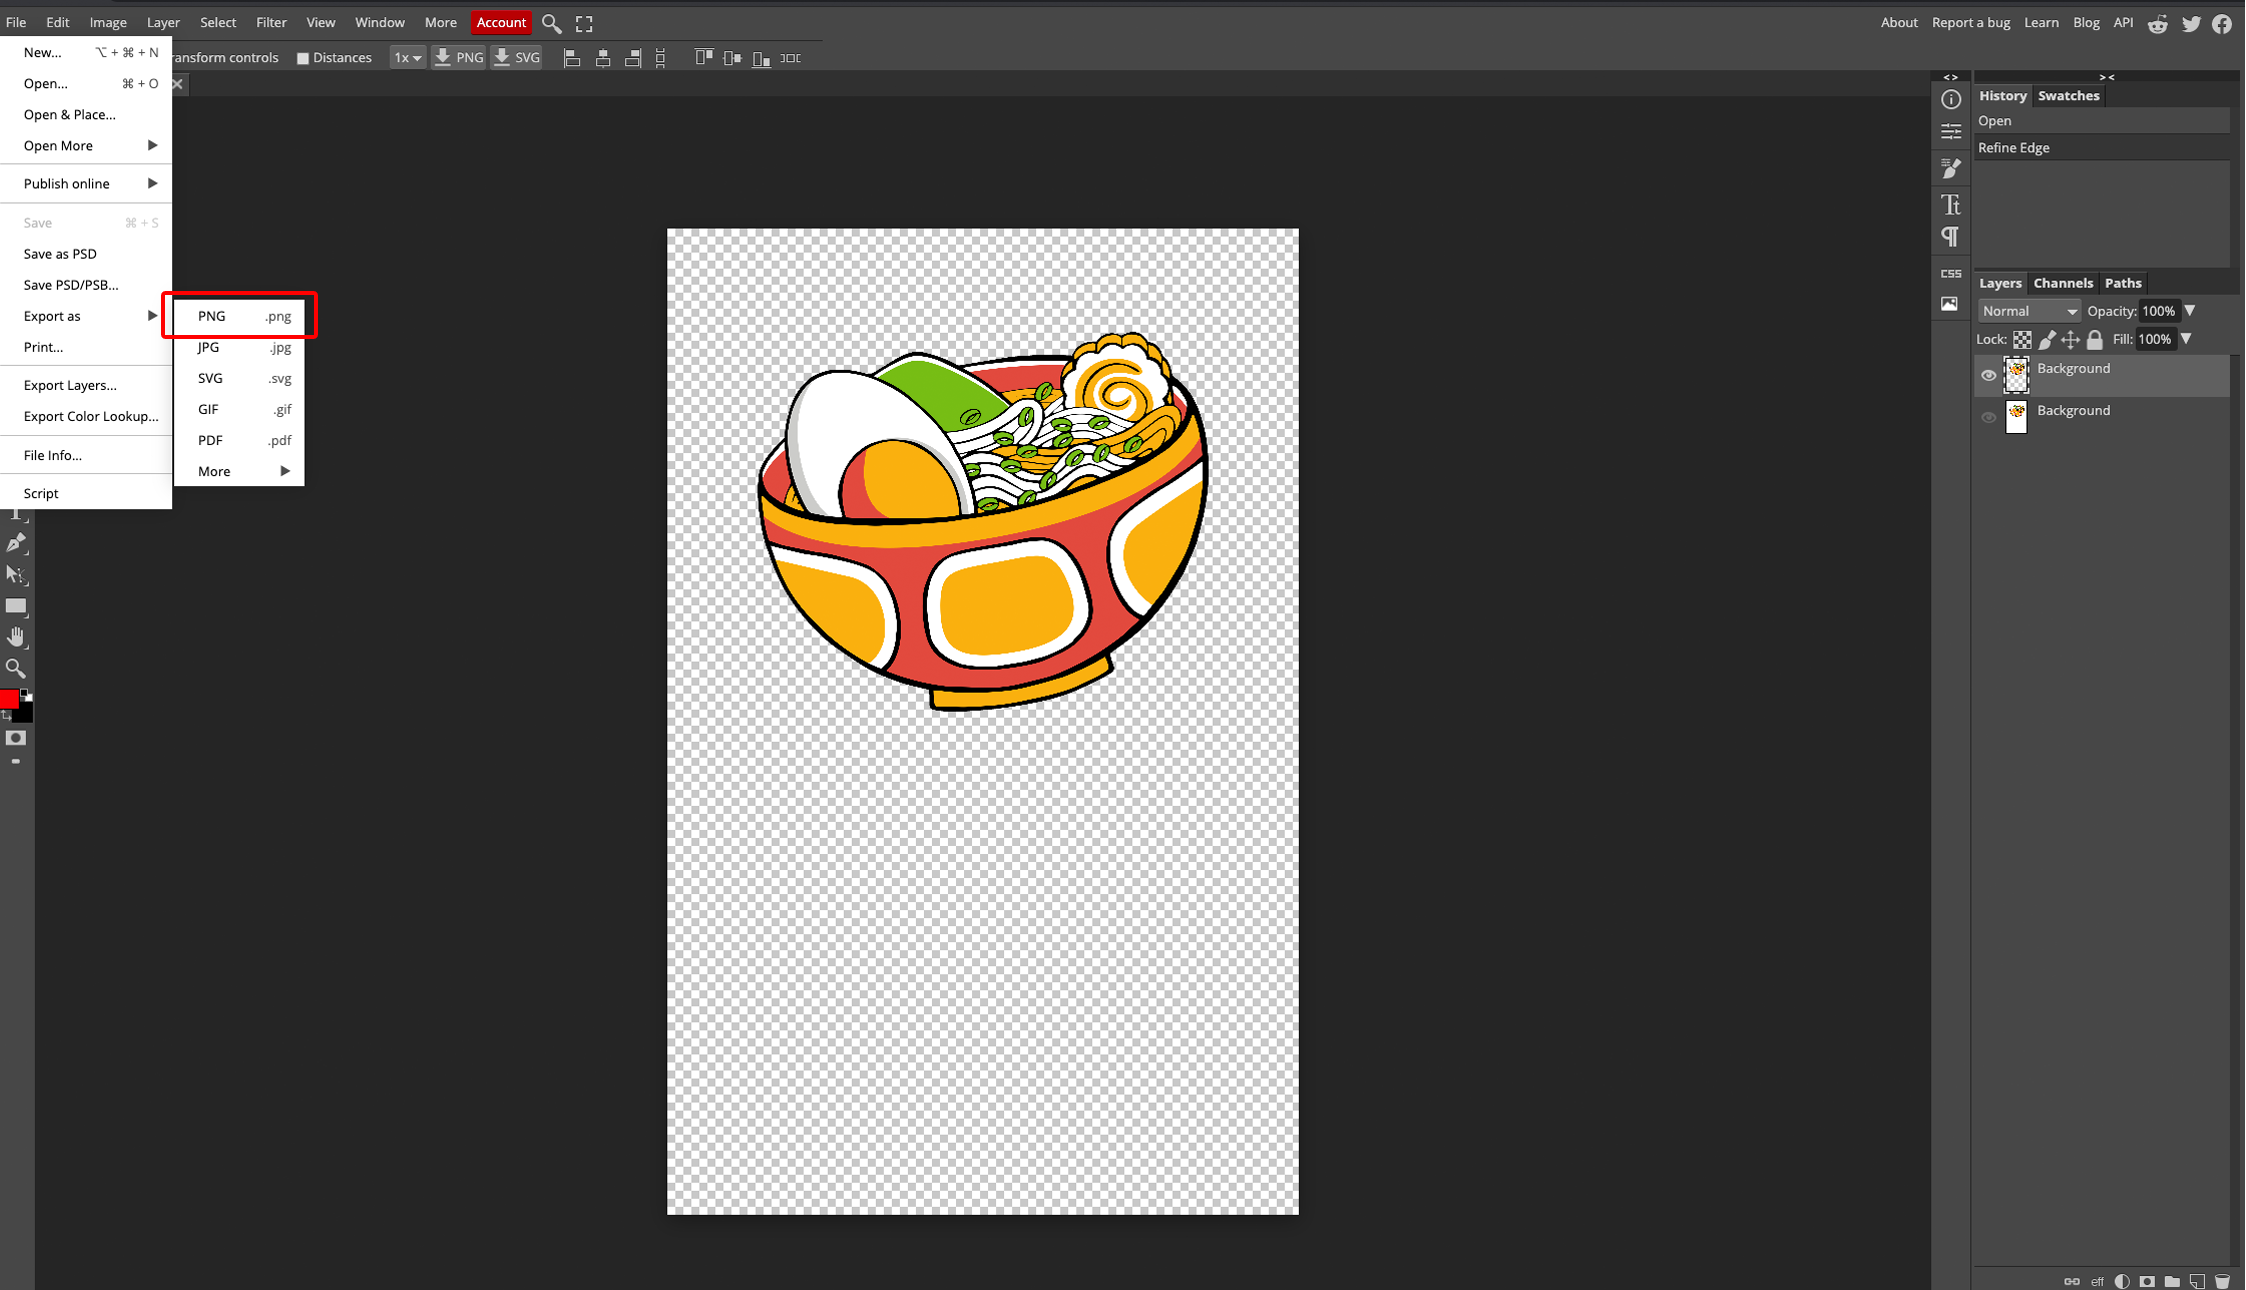
Your image should now have a grey and white checkerboard pattern as the main background. Now you're ready to export and save your image, you can do this two ways:
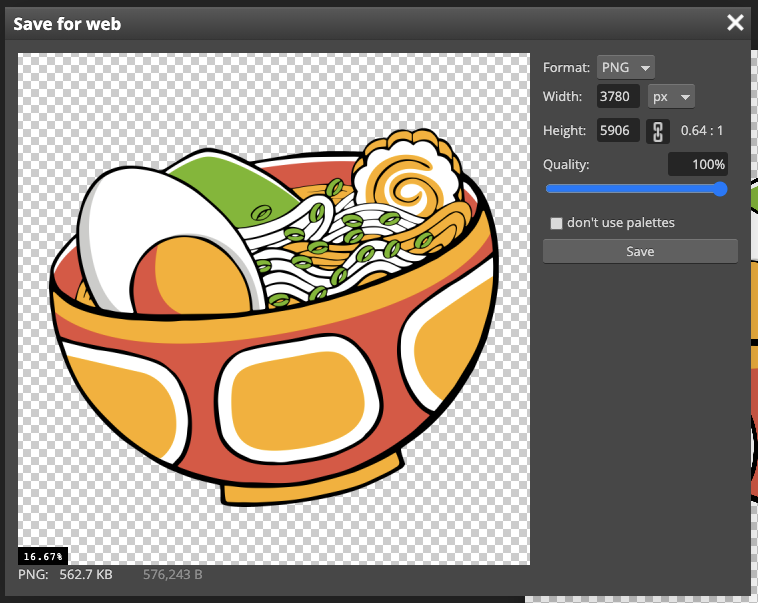
Option A: In the toolbar, click "File", then hover over "Export As" and select "PNG. This will open up a new window where you can check your image quality and dimensions before saving.
For the best results (or a templated file for an Inkthreadable Front Print Template) your file should have the following settings:
Format: PNG
Width: 3780px
Height: 5906px
Quality: 100%
Once you click the save button, your file will automatically download. This will save into your browsers default save desitination. (Usually just your 'Downloads" folder)
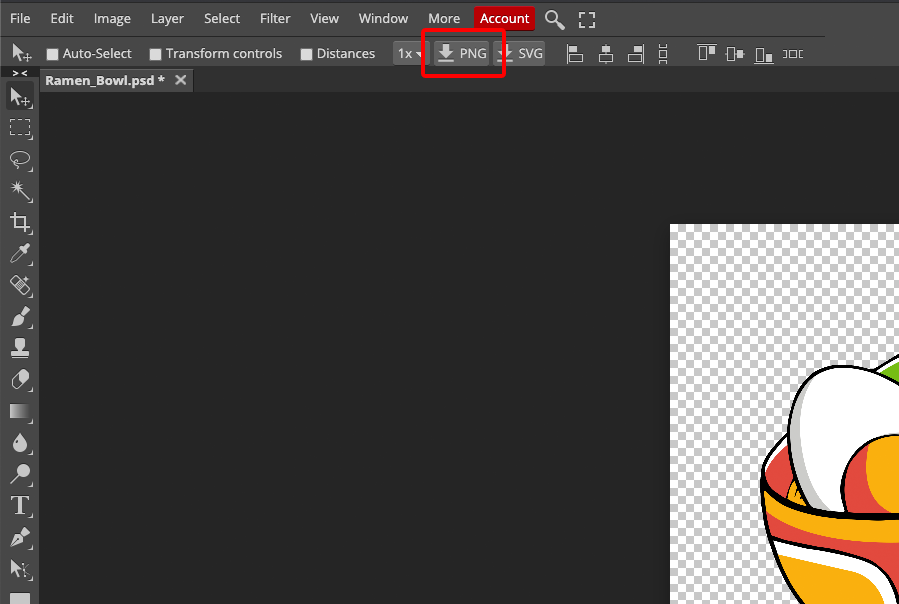
Option B: With the move tool selected, click the PNG button. This is a downwards pointing arrow, followed by "PNG".
This will instantly save the file to your PC and is a faster solution, but it offers less control over the final image quality.
Now you're ready to upload your artwork to the Inkthreadable Product Creator!
Need some more help? Feel free to join our community of like-minded creatives, The Inkthreadable Hub, or get in touch with our expert support team!